Source: GIPHY
If you are like me and you have never made an analytical model, or you do not have enough time to dedicate to learning statistics, data science, programming, databases, or SQL ... but you know the business and have questions that you would like to answer without depending on others to do it, this blog may interest you.
Source: GIPHY
The Citizen Data Scientist
First, we must talk about the citizen data scientists or knowledge workers out there, who are the people who add value to the analysis process and can simplify it using analytical models for advanced diagnoses or with predictive and prescriptive capabilities. They may not have academic training or a job function related to the field of statistics, analytics, technology, or databases.
Therefore, assisted modeling is the platform for them par excellence since it allows them to develop a model without having the data science or advanced statistics training; it is rather oriented towards responding to day-to-day business questions quickly and with the added value of knowing more about the process at the same time.
The Platform
Assisted modeling explains and defines each of the steps it takes so that it is clear to us what it is doing and why it made those decisions, even allowing us to make the selections manually if we do not agree with which it recommends, further customizing the model.

Here is an example of an explanation of the platform for assisted modeling:


We see that it not only gives us recommendations but also explains them and allows us to decide whether to take them or not, making it more flexible.
CRISP-DM Methodology
For reference, the Assisted Modeling platform is based on the CRISP-DM (Cross Industry Standard Process for Data Mining) methodology that includes five steps that must be followed in projects for data analysis from any industry to create a systematic and repeatable process.

Enter Assisted Modeling
Starting with version 2020.2 of Alteryx is assisted modeling, a new category of tools in the machine learning category is part of the Intelligence Suite plugin. It includes Text Mining and Computer Vision categories, which I will discuss in other articles.

How Can I Use It?
As an additional component, a license is required to use it.
If you download Alteryx Designer, the Machine Learning, Text Mining, and Computer Vision tools will appear with a padlock next to them and will not be usable.

If you already have your Intelligence Suite license, you can activate it to start using it.
The good news is that the Intelligence Suite also has a trial version and, if you want to hit the road running you may also get the Intelligence Suite Starter Kit that has the following industry-related use cases, with demo data, a fully documented workflow, and a nice explanation of all the steps taken.

Let’s Begin with Assisted Modeling
To start, you need data.
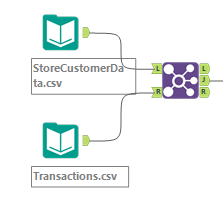
For this article, I will use a sample set that includes customer data from a Telco.
The next step is to place the Assisted Modeling tool, found in the machine learning tab, on the canvas.
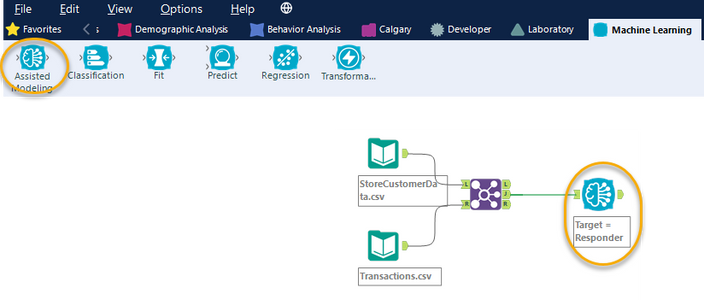
To start assisted modeling, click Run or use the shortcut CTRL -> R.

Click Start Assisted Modeling.

This will display the initial screen with an explanation of the process of creating the model and a description of each stage.

Step 1: Select the Target Variable
Select Start generating, and it takes us to the screen to select the target variable, what we want to predict.

The interesting thing about Assisted Modeling is that when selecting the target variable, it explains the type of variable and examples of what can be done with this kind of data.
To select the variable we want to predict, we can ask ourselves what we want to answer with the data, and that is all; we have to click Next.
By selecting the target field, you automatically choose the type of machine learning method, giving us use cases where you can apply it.
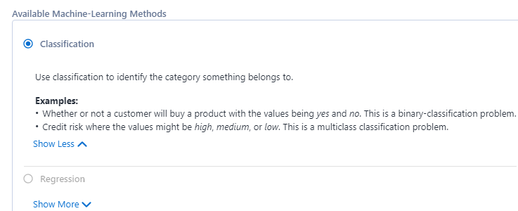
In this case, what we want to predict is a classification. The model will predict according to the available categories, which in this case are two (binary), or can be more like high, low, and medium.
We click next to go to the next step.
Step 2: Configure Data Types
In this step, the correct data type will be assigned for the data we will use to model.
According to the data, the Assisted Modeling will recommend that we discard some or change the data type, like in the case of the fields that are IDs, since they do not provide information for the prediction.

Assisted Modeling recommends the action to take:

We select next to go to step 3.
Step 3: Clean Up Missing Values
Fields with null or empty values create problems for analytical models; as part of the process, Assisted Modeling advises imputation strategies to limit the impact of these data on the results of the model.

Imputing means assigning values to an empty or null field. To do so, the variable can be completely discarded if it does not provide information or has very few values. It can also be changed to the median, mode, or mean of the rest of the values. In this way, we can take advantage of those fields with incomplete information.

We click next to continue the process.
Step 4: Select Features
Of the variables the model has, we can choose those that have a greater association with what we seek to predict so that the result is more accurate.

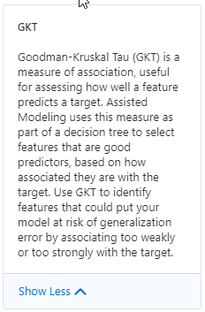
In this case, it indicates that the variable is a good predictor according to the Gini and GKT analysis.
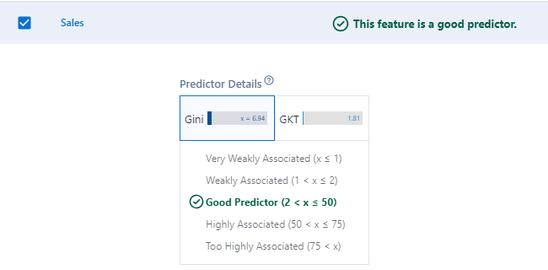
The solution also presents an explanation of the techniques used to evaluate the details of the predictors.
Predictors are the variables that will help us predict the target.
Conclusion
This concludes the first part of the series on assisted modeling.
Here we reviewed:
- The Assisted Modeling solution
- CRISP-DM Methodology
- How to begin
- Select the target variable
- Configure the data types
- Clean up the data
- Select the right features
And in the second part we’ll touch on:
- Select the ML techniques
- Understand its differences
- Compare its results
- Get some prediction explanations
- Export the analytics pipeline and custom
- Get the Python code created (automatically)
- Model Scoring
- Hyperparameter Tuning
- Export the reports for team discussion
Did I mention that all this is done with a wizard that takes us step-by-step through the entire process while at the same time providing nice and sounding explanations regarding the techniques?
Stay tuned next week for part 2!
Read part 2 here.


