With the Computer Vision Palette, part of the Intelligence Suite package (since version 21.3), we have the possibility of creating models to classify images with the tools for image recognition.

Here I will show you how to create a model for classifying images that makes it easier to identify defects in concrete pieces. Thus, instead of needing a person to visually check the pieces one by one, it is possible to create a predictive model that does it automatically and classifies them into two: those with defects and those without. This way, we will simplify the visual work and free a person from that repetitive and tedious task.
Over-fitting, under-fitting, and the art of getting a fit model
The first step will be to show images to the model with a training data set and a validation data set. We do this to ensure that the model is neither over-fitting (memorizing the images we present to it) nor under-fitting (generalizing too much about the features of the images--in other words, finding similarities between them more easily).
The ideal when we create any predictive model is that without memorizing the data, it can generalize what has been learned when it has data that it has never seen before.
Another way to illustrate this is: when we study for a test, if we have a guide and the test has questions exactly the same as the guide, we will pass by memorizing the guide, but if the questions are not the same, our grade might not be as good. On the other hand, if the guide is too superficial or generic regarding the topic, we will not be able to answer the questions correctly. However, if the questions are based on the guide but re-worded, we can answer that and other similar exams with some precision.
Data sets
As I mentioned above, we need to input three separate data sets to get a model that generalizes as well as possible.
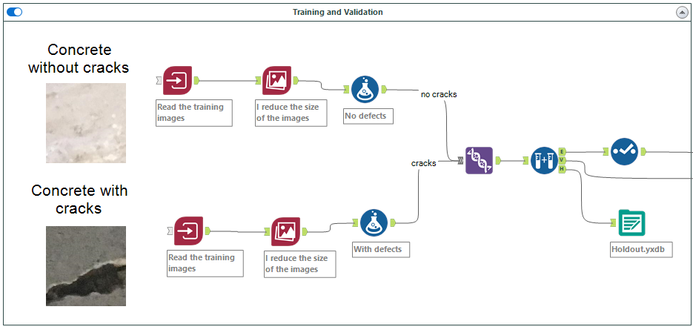
Training: It is used to make the model learn from the data and gives us the first result of its effectiveness when classifying the images.
Validation: With this set, we make sure that the model performs well by presenting it with different images than the ones we used to train it. In this way, we ensure that it does not memorize too much or overextend the characteristics of the image that we want to classify.
Holdout: When we are satisfied with the results, we will use these images to verify that the model gives optimal results according to the business objective we are pursuing.
Image reading
To input the images into Designer, we will use the Image Input block.
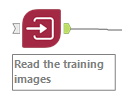
Its configuration is simple:

We can read a folder, or if we use a directory tool before, we can read the folder and its sub-folders where the images are located. Then we assign a name to the Blob column (if you want to know more about this type of file, you can read about it here). In this case, the Blob column will store the images that we read. The last step is to select the type of images we will read. The platform supports PDF, BMP, JPEG, or PNG.
Image processing
This tool allows us to process the images to improve, adjust and standardize them before creating the models.

Here we have the following options:

Select the field that contains the images. In this step, we can choose the adjustments that will be made to all the images.
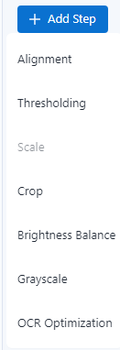
The option that stands out among those offered is optimization for OCR: Optimizes scanned PDF files for optical character recognition (OCR).
Preparing the data for the model
I add labels to each image I will use to train the classification model.
As in any predictive model, I need to have data sets with the verified cases of what we want to predict and cases that do not have the variable we are looking for. In this way, the model can classify new images based on what it learned during the training and validation phases.
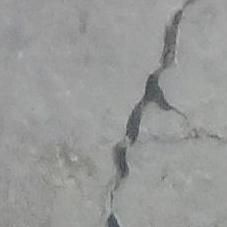
For this example, we will use concrete pieces with defects and others that do not have imperfections.
With defects:
No defects:

The idea is to have several examples of both flawed and flawless parts so that the model can classify new images as flawed and flawless effectively. The quantity, variety, and quality of the examples are key to improving the model's ability to make correct classifications.
Once we have the image sets, we create labels so that the model can identify which characteristics the concrete pieces have or do not have. Then, using the sampling block, we separate the images into the three data sets I described earlier: Training, Validation, and Holdout.

Now that the data is labeled and prepared, the next step is to train and validate the model for image recognition.
In the next installment of this blog series, I will finish the image classification process. You can read it here.
If you want to get a jump start on using Intelligence Suite, you can download the starter kit here. Or if you don't have it yet, you can start a free trial here.


