Engine Works
Under the hood of Alteryx: tips, tricks and how-tos.- Community
- :
- Community
- :
- Learn
- :
- Blogs
- :
- Engine Works
- :
- Workflow Documentation in Designer Cloud
- Subscribe to RSS Feed
- Mark as New
- Mark as Read
- Bookmark
- Subscribe
- Printer Friendly Page
- Notify Moderator
Imagine this: you’ve saved up your vacation time to take an amazing 2-week trip. Then you (begrudgingly) come back to work. You pull up your Alteryx workflows to jump in where you left off and… hmmm. You’ve forgotten exactly what you were thinking 2 weeks ago.
Devastating!
Your workflow could have really used some documentation. And if you’re struggling to interpret the logic in your own workflow, imagine how a coworker might feel if they needed to pick it up and work on it while you were off. Or how it would fair during an audit or data governance initiative.
Now that we’ve established the importance of documentation, let’s look at the options you have in Designer Cloud for documenting workflows.
Tool Annotations
Annotating your tools is an easy way to add explainability to your workflow. In the event your workflow is passed on to your coworkers, adapted for another use case, or examined by your manager, annotations allow you to describe the function of a given tool in your process.
In Designer Cloud, it’s easy to add tool annotations. Simply double-click on a tool on your canvas and the annotation text editor will highlight the default annotation so you can type your custom description.
Comments
Comments provide additional context to anyone viewing your workflow. You can use a comment to document workflow history, explain data processes, add a note for viewers, and more.
You’ll notice that there is no Comment tool in the Designer Cloud tool palette. Instead, you have two options for adding a comment: right-click the canvas and select “New Comment,” or use the button on the top left of the canvas for a new comment.
You can play around with the shape, text color, background color, and more with the “edit style” menu, accessible by clicking the three dots on the right side of a comment box.
Voila! A customized comment box.
You can even have “no shape” selected for your comments, which will give the appearance of text written on the canvas.
Containers
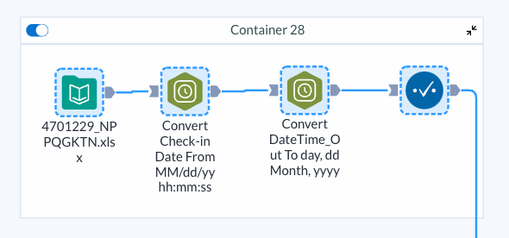
Containers are helpful for grouping tools to label processes or to enable and disable the run of the tools inside the container. When toggling the top left slide from blue to gray all the tools inside the container will not run when gray, and will run when blue. The container can also be minimized by clicking on the arrows at the top right corner.
Containers add organization to your workflows so others can understand your process at a high level.
There are several ways to add containers. Either click the container button (to the left of the comment button pictured in the previous sections), right-click and select New Container, or select a group of tools and then right-click > New Container.
Once you have your container set up, click on the default name at the top to rename it. This is a good place to indicate the process that these tools perform in the workflow.
Example
Now, let’s look at a brief example of how documentation can take your workflow explainability to the next level.
This is a simple workflow in Designer Cloud, where I calculate some metrics from data on the blog I manage:
If you were to inspect each tool, you could work out what’s going on here and why.
But here’s a well-documented version of the same workflow:
Immediately, you can understand the data processes, the metric definitions (and which ones might change), and the ownership of the workflow. You could also disable containers to run only parts of the analysis and move containers around easily for visual clarity.
While this is a simple example, as your workflow expands, so does your need for documentation!
I also like to follow the rule of Keeping it Simple. There’s no need to overdo it with documentation. Keep your future audience in mind (i.e., who else might see your workflow) and describe the tools and process as simply as you can so that documenting does not turn into a large time sink.
Conclusion
I hope you learned something new about documenting your workflows in Designer Cloud. My personal favorite tip is double-clicking on tools to edit annotations—it doesn’t get easier than that!
If you would like examples of documenting workflows in Alteryx Designer Desktop, check out these articles:
Documenting Your Alteryx Workflows
Six Alteryx Documentation Best Practices
If you have your own documentation tips or examples, please leave them in the comments below.

Sr. Content Manager
Hi, I'm Megan! I am a Sr. Content Manager at Alteryx. I work to make sure our blogs and podcast have high quality, helpful, and engaging content. As a data analyst turned writer, I am passionate about making analytics & data science accessible (and fun) for all. If there is content that you think the community is missing, feel free to message me--I would love to hear about it.
Hi, I'm Megan! I am a Sr. Content Manager at Alteryx. I work to make sure our blogs and podcast have high quality, helpful, and engaging content. As a data analyst turned writer, I am passionate about making analytics & data science accessible (and fun) for all. If there is content that you think the community is missing, feel free to message me--I would love to hear about it.
You must be a registered user to add a comment. If you've already registered, sign in. Otherwise, register and sign in.


