I recently had a session in our Virtual Solution Center where a user asked me how it would be possible to create an Excel output file with differently formatted sheets. At first, it seemed trivial, however there are some settings we need to observe in order to master this useful technique.
For example, consider the automated shipping report detailed below. Note that there are three sheets in the same file, each with a different layout, either in the color of the records, the format of the tables, and so on.
Sheet 1: Full Data

Sheet 2: Order Priority

Sheet 3: Ship Mode


This article will not focus on how to create formatted reports or graphs. (Luckily, the Alteryx Academy has excellent resources on the Reporting tools). In this example, we are going to start from a workflow that already has the reports formatted.
Step 1: Create Formatted Tables
The first step is to create 3 formatted tables:

Step 2: Set up the Sheet Names
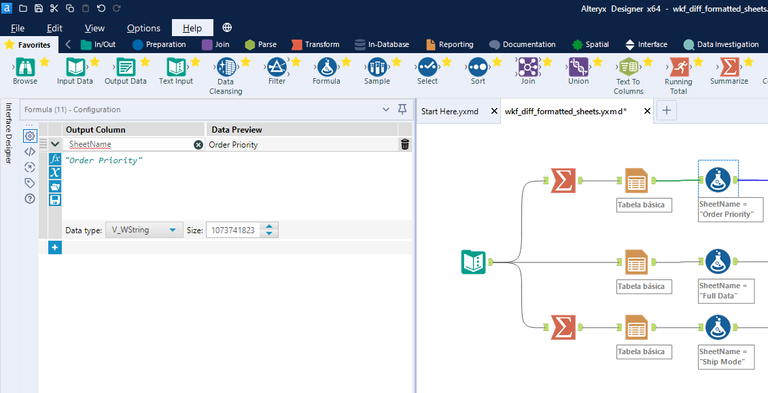
We need to create a new column with the name of each sheet; this will be key in the next steps. Let's use the Formula tool to create this new column, named SheetName, and set the values of Order Priority, Full Data and Ship Mode.

Step 3: Union All Together
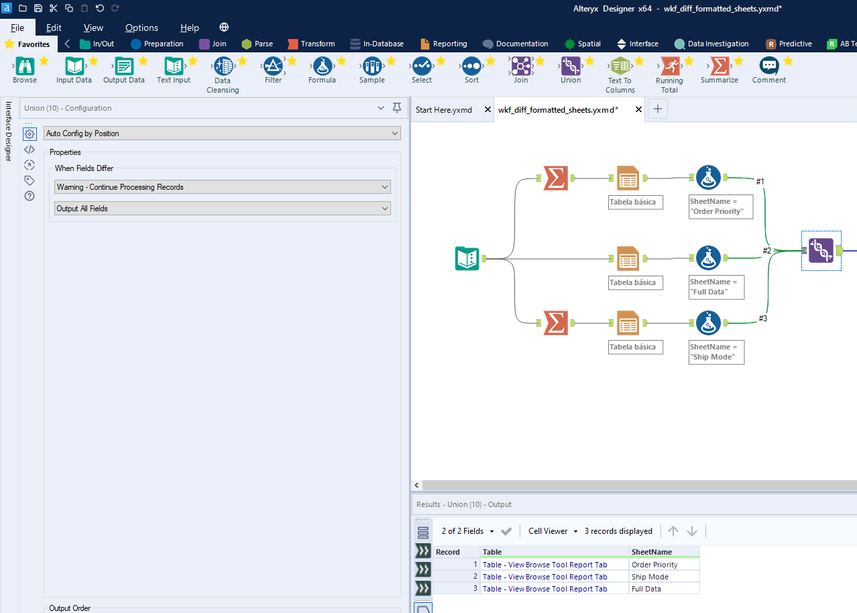
Use a Union tool to create a single output with all data streams.

Step 4: Configure the Layout Tool
Here is our ace in the hole! We use the Layout tool to define which layout belongs to each tab. By doing this, we can create a file receiving these settings. Put a Layout tool after the Union tool and set it up using the settings below:

# 1: Layout Mode - Select Each Group of Records
This will output 3 different records, each one with a layout.
# 2: Layout Configuration - Orientation: Vertical with Section Breaks
When we select this option we are saying to Alteryx it: Please, use a layout to a specific tab.
# 3: Section Name: Select the column SheetName
Here, the tab is associated with a layout.
This will generate 3 outputs:

Step 5: Create the File Name
To write the new file, we need to create a new column call FileName. (This is the key step mentioned at the beginning.) The current datetime is also included in the file name.

Step 6: Set up the Output File
We've used a Render tool to create the excel file with the formatted sheets. Let's configure this tool that will be receiving three rows, each one with a specific layout.

Now, we have our output file with three different tabs. Using this method we can create sheets with individual graphs, headers, footers and all things that the Reporting tools allows us to do.