Engine Works
Under the hood of Alteryx: tips, tricks and how-tos.- Community
- :
- Community
- :
- Learn
- :
- Blogs
- :
- Engine Works
- :
- A Map Making Machine
- Subscribe to RSS Feed
- Mark as New
- Mark as Read
- Bookmark
- Subscribe
- Printer Friendly Page
- Notify Moderator
The source code and sample modules for this post can be found at the bottom of this post.
I never cease to be amazed at all of the things that Alteryx Alteryx can create thematic maps, and accessing Alteryx from a web handler via the API is a no-brainer. I should be smart enough by now to keep such thoughts to myself.
But I'm not, so I put myself out there and said that I thought that it could be done. Now I was on the hook to make it work. Fortunately Alteryx did not let me down.
OK, let's take a look at the pieces I would need in order to make this work. Both Google and Bing Maps allow custom map tiles to be layered onto their base maps. The basic methodology is that through JavaScript you can provide a URL that will serve up the map tiles as requested. The URL will be provided with some type of map tile reference that determines what map tile is to be provided. The URL will need to return a map image for the requested tile.
So, my basic architecture will be an HTML page with a Google Map object and a Bing Map object that the user can switch between. Through JavaScript, I will add custom tile layers to both using a URL that points to an ASP.NET handler. The handler will take the map tile reference, convert it to a latitude and longitude bounding box for the requested tile, and pass that to an Alteryx wizard that will create the map image. The handler will then read the map image, perform any necessary conversions to it, and return it to my HTML page for display on the map. Sounds easy enough, right?
My first challenge was to get a map image out of Alteryx. Most of you are probably already familiar with the Map Tool (if not, check it out under the Report/Presentation section of the Alteryx Toolbox). The Map Tool is great at creating thematic maps – that's what it was designed to do. However, it's not so great at outputting map images. It just doesn't do that. Instead, it outputs the map as a "report snippet" that can then be output to a file via the Render Tool. Great, I'll just use the Render tool to get my output.

Not so fast! The Render tool is built to render reports, not images, and only supports output formats that make sense for reports (things like PDF, Word, Excel, HTML, etc.,). Google Maps wasn't going to let me layer a PDF on it. But wait – if Alteryx can render an HTML file, then it's got to create an image file for the map, right? As it turns out, it does. In fact, it creates a PNG file, which is just what I need to mash up with Google and Bing Maps.
Now that I had jumped that hurdle, all I had to do was get my data into the Map Tool, set the thematic options and zoom to the bounding box that was passed in to the wizard.
There are a number of ways that I could have passed the bounding box information into the wizard. But I wanted to try out the Text To Columns Tool, so I created a Text Input tool that has one field ("bounds") and one record.
The record had this format:
minx,miny;minx,maxy;maxx,maxy;maxx,miny
and would be updated by the wizard actions during runtime with the bounding box for the requested map tile.
I then used the Text To Columns Tool to split the string into rows on the ';' delimiter. That gave my each x,y pair in its own row. Next I used the Text To Columns Tool to split those values into columns on the ',' delimiter. Now I had each x and y coordinate in its own column. I ran those through the Create Points Tool to create spatial objects for the coordinates, and then passed those into the Poly-Build Tool. This results in one record with my bounding box as a spatial object.

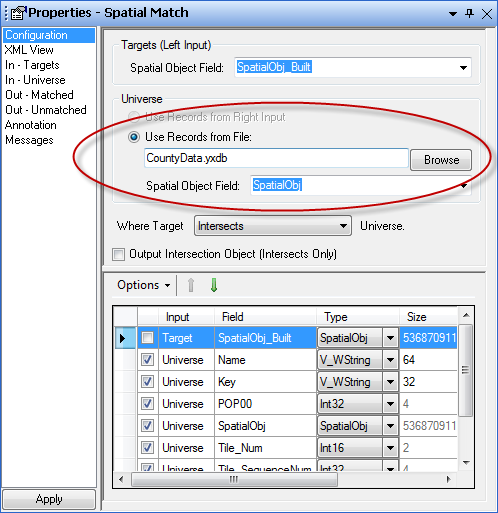
Next I knew I had to use the Spatial Match Tool in order to filter my geography. So I hooked up my bounding box data stream to the "Target" side of the Spatial Match Tool and hooked up the "Universe" side to an Allocate Input Tool. I figured that made sense since I needed to get geography and data to theme the map on and that's what the Allocate Tool does. I decided to use Counties for the geography and US Census 2000 Population for the data.
I also decided that now was a good time to do a sanity check, so I hooked up the "Match" results from my Spatial Match Tool to the Map Tool and ran it – just to see how well it worked. And then I waited. And then I waited some more. OK, it wasn't really that bad. After all, Alteryx is blazingly fast and 11 seconds to extract all of the counties and map them isn't horrible. But it's definitely too slow for a map tile server.
How could I speed this up? What if I used another module to write out the county data to a YXDB file and then used that as my input instead? That brought me down to about 3.5 seconds. Much better, but still not quite good enough. I knew I must be missing something. Surely Alteryx could do this spatial match faster than this.
So I did what I always do when I get stuck with Alteryx: I asked Ned. And as always, Ned knew what to do.
"Are you reading the YXDB directly for the Universe?" he asked.
"Huh?" I responded. "I'm just reading the YXDB in an Input Tool."
"Oh. You should try reading the YXDB directly from the Spatial Match Tool."
"Huh?" I responded again, demonstrating my vast knowledge of the product.
"Yeah. If you do that, the Spatial Match Tool can use the YXDB's spatial index and it will be much faster. If you read a YXDB with an Input Tool, you lose the spatial index. In fact, the Spatial Match tool will write out a temporary YXDB file from the input stream, so in essence you are just reading in a YXDB and writing another one out again. Oh, and if you sort your data by the spatial object field before writing out the YXDB, that will help, too."
"I'll have to give that a try." I said, trying not to sound totally lost. Actually it made perfect sense, once I thought about it. I just didn't know that the Spatial Match Tool even had that option (which is, of course, nobody's fault but my own since it's sitting right there in the properties window). And sorting by a spatial object? Again, I didn't know Alteryx could do that. So I gave both things a try and, boom – about a half second to render the map. Did I say Alteryx was fast? Now we're talking!
There was only one other little problem. The theming on the map tiles wasn't consistent. For example, if a county was split across two tiles, it might get rendered purple in one, and red in the other.
This obviously wouldn't do, and the reason was perfectly clear. The thematic functionality of the Map Tool could only operate on the set of data presented to it. Since I was spatially filtering the counties by the map tile's bounding box, the Map Tool was only seeing the data for the counties that would be displayed in that tile. And since each tile was different, the thematic classification for each tile would be different.

What I needed to do was assign a thematic classification to all of the counties and then use that to theme on. So back in the module I used to create the YXDB file (with the county data now sorted by Spatial Object – thank you Ned!), I inserted a Tile Tool. The Tile Tool's sole purpose is to classify data. I chose the "Smart Tile" option, which assigns each record an index based upon the Tile Field's value: -3 (Extremely Low), -2 (Low), -1 (Below Average), 0 (Average), 1 (Above Average), 2 (High), 3 (Extremely High).
Perfect. Now each county would have the right classification no matter what was shown on the map tile. Except for one not-so-minor detail: the Map Tool would still only see the counties that are passed to it, so the color range would still be different for each tile. If only I could ensure that all of the possible values were present for each tile.... What if I just added some "empty" records with those values? Would that work? So in comes another Text Tool with one field ("Tile_Num" – to match the field that the Tile Tool added to my YXDB file) and one record for each value (-3, -2, -1, 0, 1, 2 and 3). I used a Union Tool to append those records to my data feed and lo and behold it actually worked! Now the thematic colors were consistent across all of my map tiles.

Now all that was left was to create the handler that would serve up the map tiles to my web page. Remember at the beginning of all of this when I said that accessing Alteryx from a web handler via the API is a no-brainer? Well, that's mostly true. The Alteryx API makes it very simple to execute a wizard. The problem was that both Google and Bing Maps make a lot of simultaneous requests for map tiles. Since the standard map tile size is 256 x 256 pixels, a 640 x 480 pixel map is going to require...let me get my calculator out...carry the 2...6 or 9 tiles (depending on how they lay out).

Most Alteryx server licenses allow you to run only 4 simultaneous Alteryx Engines (this number can be increased – see your friendly Alteryx Client Services rep for details). To see how many you are licensed for, choose Tools->Manage Licenses from the Alteryx menu. If you try to exceed your allowed number of simultaneous engines, Alteryx will throw an error and the map tile will not be rendered.
In order to account for this limitation, I used a Semaphore and set its count to 4 (to match the number of simultaneous engines my license allows). I then wait for the Semaphore to be available before I run my wizard. This means that after the first four tiles are requested, the other requests will have to wait until a process become available. Fortunately at half a second to render each tile, the wait period is not very long.
Here is the code for the Semaphore (for those of you who like that sort of thing):
public class MapTileHandler : IHttpHandler {
	// Create a Semaphore to help us manage our allowed simultaneous instances of Alteryx.
	// Provide a name for the Semaphore in case we create other web services that also need
	// to share these instances.
	static System.Threading.Semaphore semaphore = new System.Threading.Semaphore(4, 4, "Alteryx");

	public void ProcessRequest (HttpContext context) {
		...
		// See if we have an instance of Alteryx available and if not,
		// wait as long as 60 seconds for one to free up.
		if (semaphore.WaitOne(TimeSpan.FromSeconds(60.0)))
		{
		    try
		    {
		        // Run our wizard in a separate process so if Alteryx fails,
		        // it doesn’t bring down IIS.
		        if (wizard.Run(Alteryx.RunnableDocument.RunMode.OutOfProcess, parameters, "", 0))
		        {
					...
		        }
		    }
		    catch (Exception e)
		    {
				...
		    }

		    // Make sure we release our Semaphore or bad things will happen.
		    semaphore.Release();
		}
	}
}
Another challenge I had was in dealing with the map tile references used by Google and Bing Maps. Google asks for each tile by specifying an X, Y, and Zoom (see Google Maps Coordinates for more information). Bing asks for each tile by specifying a rather cryptic quad key (see Bing Maps Tile System for more information). Unfortunately these values are not in any standard coordinate system, so they need to be converted to a latitude and longitude bounding box for my wizard to work.
Fortunately, Ian Erickson (whom you may know as our Chief Architect, Core Web) had already tackled this problem for our Alteryx Web product and has graciously allowed me to use that code in this sample. I'm not going to attempt to explain that code here (mainly because I haven't taken the time to understand it fully myself), but suffice it to say that it works.
The final issue was that the map images created by Alteryx were not transparent. This meant that once they were overlaid onto Google or Bing Maps, you couldn't see any of the map detail behind them. That kind of defeats the purpose of this whole exercise (actually Bing Maps allows you to set a transparency for the map tiles, but since Google Maps doesn't I had to solve the problem anyway). The way I chose to get around that was to read the PNG file and use the .NET graphics functionality to set the transparency.
Here is the code to do that:
// Read the image that was created by Alteryx
Bitmap image = new Bitmap(System.IO.Path.Combine(imageFolder, images[0]));

// Make white transparent
image.MakeTransparent(Color.White);

// Create a new, empty image that we will draw the original image into
// setting the transparency for the new image as we do so.
Bitmap transparentImage = new Bitmap(image.Width, image.Height,
    PixelFormat.Format32bppArgb);

// Get the graphics for the new image and paint a transparent fill into it
Graphics g = Graphics.FromImage(transparentImage);
g.FillRectangle(Brushes.Transparent, 0, 0, image.Width, image.Height);

// We will use the ColorMatrix class to set the alpha channel to 0.5 for
// the entire image
ColorMatrix matrix = new ColorMatrix();
matrix.Matrix00 = 1;    //red channel
matrix.Matrix11 = 1;    //green channel
matrix.Matrix22 = 1;    //blue channel
matrix.Matrix33 = 0.5f;  //alpha channel
matrix.Matrix44 = 1;    //w - always 1
ImageAttributes attributes = new ImageAttributes();
attributes.SetColorMatrix(matrix);

// Draw the original image into the new image using the ColorMatrix
g.DrawImage(image, new Rectangle(0, 0, image.Width, image.Height), 0, 0,
    image.Width, image.Height, GraphicsUnit.Pixel, attributes, null);

// Dispose of the original image so we can delete the file
image.Dispose();

// Delete the temporary files created by Alteryx
DeleteImage(System.IO.Path.Combine(serverPath, tempFile), imageFolder);

// Save the new image into the Response's OutputStream
transparentImage.Save(context.Response.OutputStream, ImageFormat.Png);
context.Response.Flush();
And that's basically it - phew!
There are a few things to consider, though, before you run out and set up an Alteryx map tile server. Remember that this code attempts to use all of the available simultaneous Alteryx Engines that you are licensed for. Because of that, it would probably be best to host this kind of a service on a dedicated server where other processes aren't also trying to use Alteryx. The Semaphore that I used in the code only checks to see if it (the Semaphore) is being used, not if Alteryx is being used. If you do need to deploy other services on the same server, they should use the same named Semaphore as this service does in order to avoid conflicts.
Also, map tile servers can take up a lot of system resources if people are requesting a lot of maps. Make sure you have an appropriate server to handle the volume of requests that you anticipate.
Finally, please keep in mind that this sample code is just that: a sample. It is in no way intended to be production-quality.
With these things in mind, however, it should be a fairly simple exercise to expand this sample to allow for requesting different geographies and different data variables. I tried this with ZIP Codes and Block Groups and both seemed to work fairly well on my limited hardware. I will leave that implementation as an exercise for the reader.
The source code and sample modules for this post can be found here

Director, Visualytics and Analytics Products
I've been with Alteryx since 2010 and have worked primarily on the Gallery and Server products. I've recently joined a new team focused on improving how Alteryx integrates with distributed computing platforms.
I've been with Alteryx since 2010 and have worked primarily on the Gallery and Server products. I've recently joined a new team focused on improving how Alteryx integrates with distributed computing platforms.
You must be a registered user to add a comment. If you've already registered, sign in. Otherwise, register and sign in.