TLS(Transport Layer Security)and its deprecated predecessor SSL (Secure Sockets Layer) aim to provide privacy and data integrity between two or more communicating computer applications. TLS and SSL are standard protocols used to helpensure that the internet connection is secure, that the identity of communicating parties is authenticated, and that the connection is private. This helps to prevent any internet bandits from reading and/or altering any of the information being transferred over a connection. Connections can be made between a server and a client (a website and a browser) or a server and a server.
Promote uses the application NGINX as a load balancer.In Promote, NGINX is configured to require TLS or SSL certificates. This helps ensure that each component of Promote, from the submission of variables to the output of any given model, is secure.
On each node of a Promote instance, a key file and a certificate (cert) file must be accessible under the path /var/promote/certs. Without these files, NGINX will not run, and the Promote instance will be broken.
The good news is that the Promote installer will generate self-signed certificates if you do not have your own. The less good news is that self-signed certificates are not recommended for proper TLS/SSL encryption, as they are not issued by a certificate authority (CA). Typically, a self-signed certificate is sufficient for on-premise installations that are not exposed to the internet. If this is not the case for your instance of Promote, we strongly recommend using a TLS/SSL certificate issued by a CA. For some guidance on obtaining a TLS/SSL certificate, please see this Alteryx Server Knowledge Base Article: Configuring Alteryx Server for SSL: Obtaining and Installing Certificatesup to the sectionConfiguring Alteryx Server to Use the Certificate.This article will review the process of configuring Promote to use a TLS/SSL certificate.
Specifying TLS/SSL Certificates During Installation
If you have yourTLS/SSL certificates ready to go at the time of installation, you can follow these steps to incorporatethem into your Promote instance.
Note: You will need Secure Shell (SSH) access to each machine in your Promote instance from the machine you are installing from.Because the installation process forces a reboot of all machines in the Promote instance, it is recommended to save this installer on a machine outside of your Promote instance.
The first step is to save a copy of your key file and your cert file in a folder named certs. The certs folder should be saved in the same folder where your installer.sh script is saved. This folder should have the following three items: the certs folder, the installer.sh script, and the promote-el7.tar.gz file.

Once this is set up correctly, you can run your installer script. When the installer script prompts with Do you have your own certificates you would like to use?, confirm this option by selecting"y".

After you confirm this prompt, the installer will check for your certs folder. If this folder is set up as expected and contains accessible copies of both the cert.pemfile and the key.pemfile, you will get a success message.

If you have confirmed that you would like to use your own certificates, and the installer is unable to find or access the cert.pemand key.pemfiles, it will return an error message that reads Please ensure you have a "/certs/cert.pem" file in the certs directory, and the installation will terminate.

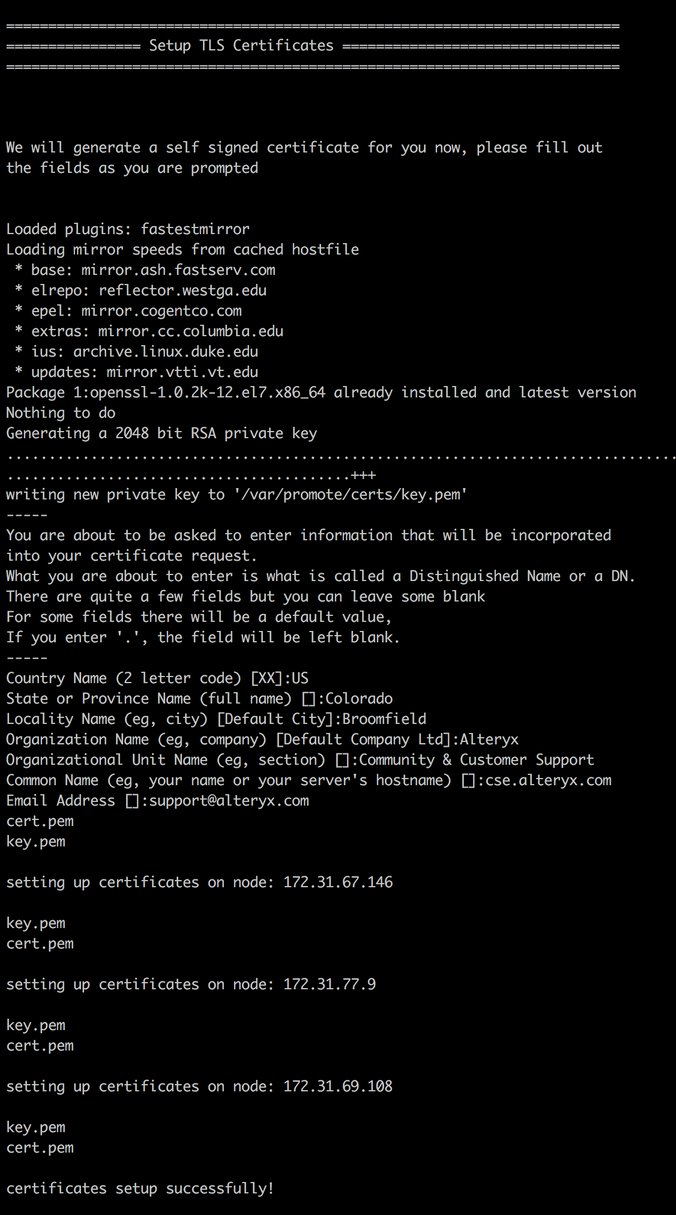
If you selected no when prompted to use your own certs, the installer will walk through the setup of generating self-signed certs on all nodes in your Promote instance.

Adding or Changing TLS/SSL Certificates (after Promote is already installed)
If you need to add TLS/SSL certificates issued by a Certificate Authority after installing promote, or you need to update or change your certificate, you can do so in a few simple steps.
After you have obtained a Key, Certificate, and ca-bundle from a Certificate Authority (this step will likely need to be done by your IT team), create achained cert file by putting the cert file and ca-bundle into a single file, cert file first.
Once you have your certificate bundle, rename your key file to key.pemand the chained cert you created to cert.pem. You will then need to Secure Copy (SCP) the key.pem and cert.pem files onto all of the nodes in your Promote instance, and overwrite the existing key.pem and cert.pem files in the directory /var/promote/certs.
Once the files are overwritten with your new files, you will need to restart NGINX so that the certificate changes will be recognized. You can start the NGINX service with the following command:
sudo docker service update promote_nginx --force --detach=false
Please note that restarting NGINX will cause some downtime for your Promote instance.