There are three authentication options in Alteryx Connect that an Administrator can configure for their environment: Manual auth, Windows AD auth, and SAML auth. Please note that Manual auth is always a fallback option, even if you’re using Windows or SAML, which is a notable departure from Gallery authentication, which does not allow mixed authentication modes.
Manual Authentication
The simplest form of authentication is manual auth, in which a username and password are supplied.
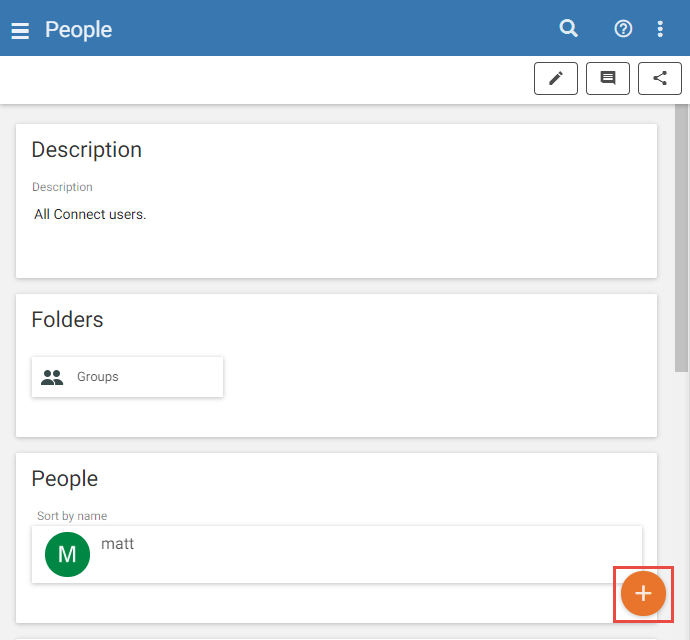
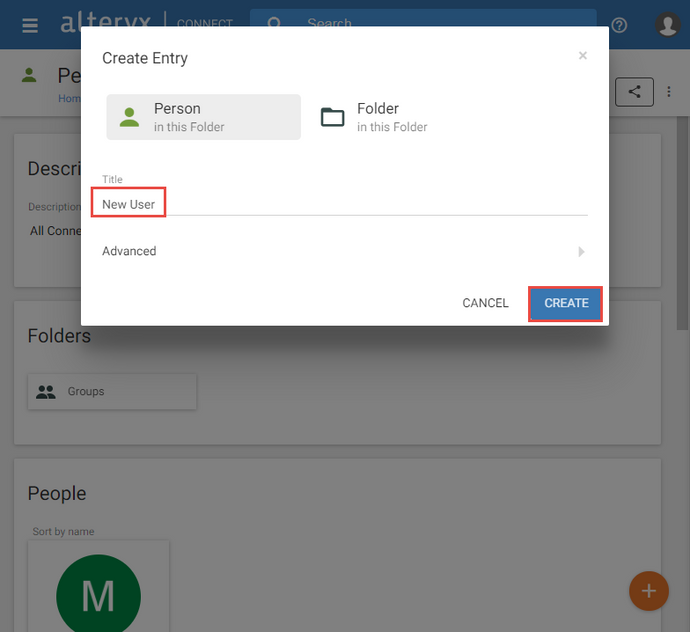
- From within the “People” section, a member of the Administrator group can create a new user account by selecting the orange “+” icon in the bottom right hand corner of the screen


- Alternatively, user can create accounts themselves using the “Sign Up” option from an “Allowed Domain”

1. Email address is always required when setting up users in any auth mode
2. “Login” should be supplied
3. Administrator may choose to leave password blank, allowing the user to use “Password Lookup”
Note: To specify an “Allowed Domain” for users to “Sign Up” for your Connect instance, please follow the instructions below
Connect supports the whitelisting of domains from which users can sign up. If a user has an email address with an allowed domain, they can sign up for access. With a new installation, always review these definitions.
1. Use the search bar at top to navigate to the “Allowed Domains” page (Datasources > Categories > Domains > Allowed Domains

2. As an Admin, click “Edit” at top right of Allowed Domains

3.Add your company domain(s)
4. Delete the two default values with the “X” on the far right
5. Click “Save” at top right

Windows Authentication (AD)
Windows Authentication uses Active Directory credentials from the user.
- Turn on Windows auth by checking the “Use Windows Authentication for Single Sign-On” checkbox in the Admin console under “Single Sign-On” (Administration > Connect Configuration > Single Sign-On

- Manual auth and Windows auth can coexist for the same account
- Email address is the key between the two auth types
- Users can log out of their Windows auth session and log in with a different manual account
- If the Connect Server became unbound to an AD domain, users could still access the site with manual authentication
- Windows auth requires browser trust, either with SSL/TLS or by adding the Connect domain to a client browser’s “Trusted sites”
- Win auth supports a single AD domain
- After turning on this option, access the site with a new browser session to test
For more information on this option please see the help documentation available here.
SAML Authentication
SAML 2.0 is supported for authentication to Connect. Click+ ADDto open the New SAML window in the Admin console under “Single Sign-On” (Administration > Connect Configuration > Single Sign-On

Provide aName,Icon, andDescriptionof the new IDP. Then select the method you want to use to provideIdentity provider details. You will likely need to visit the IDP site for the necessary information
- Add IDP endpoint: Enter theSSO URL endpointandEntity ID, which is a globally unique name for a SAML entity. The ID and endpoint locations do not need to match, but both should contain the needed URL paths and ports to be reached by an external service
- Upload IDP metadata: ClickChoose Fileto browse to a local XML file that contains the IDP metadata, then clickOpento upload the file
- Get IDP metadata from URL: Provide theIDP Metadata URL. Connect can only access publicly-available URLs
In theActivefield, click the black icon to enable an IDP for use. Confirm, and a confirmation message appears in the bottom left. The icon changes to a green check mark.
In theActionsfield
- Click the pencil icon to edit an existing IDP connection. ClickSave to confirm
- Click the trash can icon to remove an existing IDP connection. ClickRemove to confirm
Use the information provided underAlteryx Connect Detailswhen registering Connect as a service provider with an IDP. For more information on how to register a service provider with an IDP, see the IDP's documentation.
- Endpoint URL: The location an IDP points to when making a connection
- Entity ID: The unique identifier for Connect as a service provider
- Start URL: The URLavailable when first logging on to your Connect instance
- Download Service Provider Metadata: This creates a service provider metadata file that can be used to configure the IDP when configuring SAML single sign-on